Kindergarten-Tutorial: Cloth
I will now explain the handling of the Cloth Plugin in Animation:Master 2000 on basis of a very simple example (a cloth falls on a ball)
- start of the program
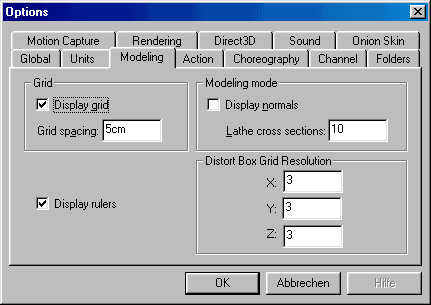
- click in the upper menu border on Tools - > options... . Then click in the new opened window on the record sheet Modeling. There set the adjustment Display grid and Lathe cross section to 10.
- click in the upper menu border - > Project - > New
- proceed in the Project
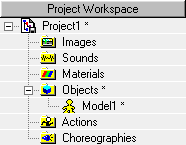
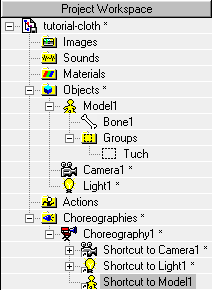
Workspace with a right mouse-click on the Icon ![]() (not on the word Objects) - > New - > Model
(not on the word Objects) - > New - > Model
- go into the Add Lock mode
(Shift + "A" or on the button ![]() of the right menu border)
of the right menu border)
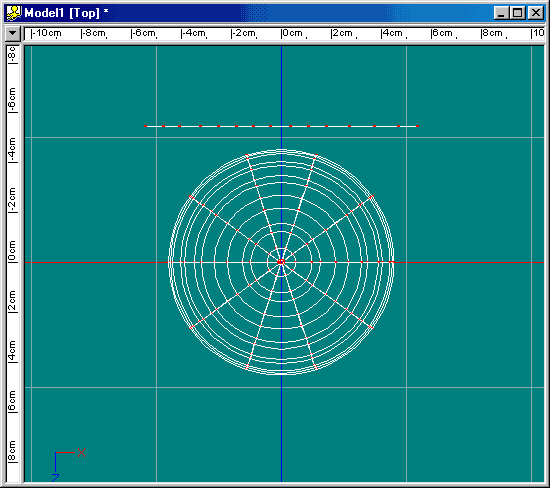
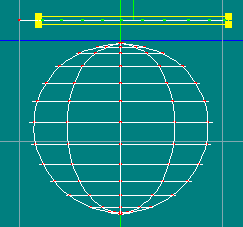
- at the coordinate 0,0 in the Model1-window click once left and then produce in a semi-circle further points . In order to leave the Add Lock mode again, simply press the right mouse button.
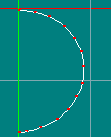
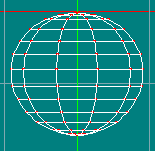
- click one point on the semi-circle and apply Lathe
("L" or button ![]() of the right menu border). Now a ball with 10 sections (before above with
Lathe Cross sections adjusted) should have developed.
of the right menu border). Now a ball with 10 sections (before above with
Lathe Cross sections adjusted) should have developed.
- now we continue to go on with the cloth which is to be thrown over the ball...
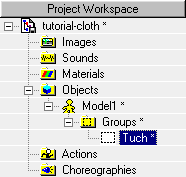
- change the view (with the key "5" on the number block) to the top view .
- center the ball with the help of the keys "M" (move) and "Z" (zoom) into the window center.
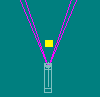
- go again into the Add Lock Mode (Shift + "A") and create a line above the ball .
- now with pressed left mouse button mark this line
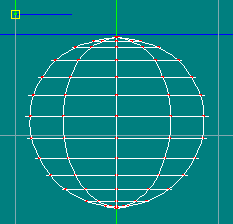
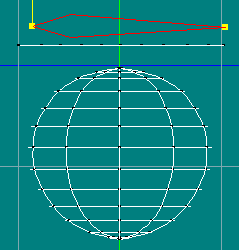
- change into the left view (key "4" on the number block).
- then shift the marked line (yellow box) to the left above the ball. Possibly the window has to be aligned with the help of the keys "M" (move) and "Z" (zoom) again to be suitably .
-
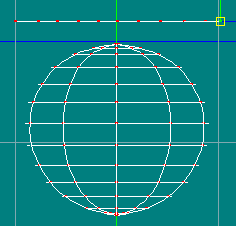
go into the Extrude Mode (" E " or
button ![]() of the right menu border). Shift the new developed yellow box to the right
apart from the origin of the group of points. Repeat this process until a
line developed which exceeds over the ball.
of the right menu border). Shift the new developed yellow box to the right
apart from the origin of the group of points. Repeat this process until a
line developed which exceeds over the ball.
- as a check you can view the new object in 3d. Simply press the key "T" and rotate with pressed left mouse button the content of the window. To get to the old view simply press the key "4" on the number block (left view).
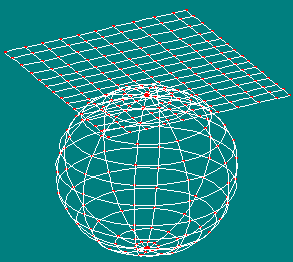
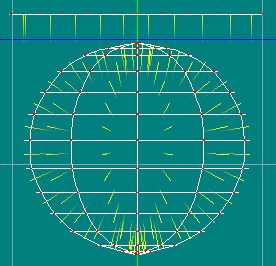
- now the region of the object has to be defined which later than cloth is to be simulated.
- mark the points in the left view (key "4" on the number block) with the help of the left mouse button as shown in the picture below
- in the Project Workspace windows doubleclick on the signature "Untitled" and give the evenly marked area a name (e.g. Tuch (german for cloth)).
- thus the program with the later simulation can differentiate the cloth of the remaining body we must the evenly defined area mark with its own bone.
-
go into Bones Mode
("F6" or button ![]() in the upper menu border).
in the upper menu border).
- go into Add Mode
("A" or button ![]() of the right menu border).
of the right menu border).
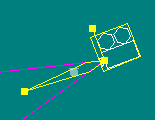
- create with pressed left mouse button a bone above the beforehand defined cloth . This can be subsequently still be shifted and extended at the yellow control points.
- click the bone once and mark the beforehand defined points of the cloth with the left mouse button. These should blink now in the colour of the bone (red).

- now it must be checked whether the Normals of the ball point outward. If this should not be the case, the cloth would easily penetrate the ball. To control this the keys shift and 1 must be pressed at the same time.
- in case the normals of the ball point inward,
they must be turned. Mark the ball and click it with the right mouse button. In the following menu select Flip Normals
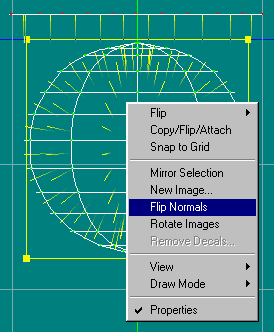
the normals should now point outward. Now the display of the normals can be switched off again (Shift and 1).
- in the Project Workspace
click with the right mousebutton on the Icon ![]() (not on the word "Choreographys") - > New
Choreography.
(not on the word "Choreographys") - > New
Choreography.
- copy in the Project Workspace Model1 with drag and drop (click with the left mouse button and keep it pressed, while one shifts the object) into the new directory Choreography1.
now shift the Model1 (yellow marked) directly before the camera
and press the key "4" on the number block (side view).
- click the camera and shift downward.
- now press the key "1" on the number block (camera perspective).

-
click in the Project Workspace "Shortcut
toModel1" and afterwards go into the Muscle mode
("F7" or the Button ![]() in of the upper menu border).
in of the upper menu border).
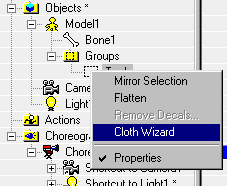
- right-click in the Project Workspace on "Tuch" (our beforehand defined area... remember "Tuch" means cloth in german) and there select Cloth Wizard.
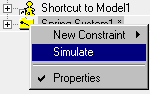
In the Project Workspace a new branch "Spring System1" should now have appeared
- with one click of the right mouse button we call the menu Simulate and let the computer complete the remaining work :-D
Here
is the result:
[Attention! If you use
Quicktime on your computer there are problems. Unfortunately Quicktime
isn´t able to play MPG4. You should right-click the movie an save it. Use
the Mediaplayer an everything should work.]
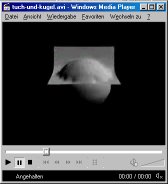 |
Animation in MPEG 4 -format [9 KB] | or | the Projekt-File [12 KB as Zip-file but without calculated Cloth-Wizard (The file would be too big)] |
Further tips for Cloth:
http://venice.killernuts.org/animaster
[Archives of the mailinglist]
www.hash.com/am2000/ClothDiane3.prj
[The ClothDiane.prj mentioned in the handbook]
http://students.washington.edu/odinseye/
[a very good tutoral by Bjorn Cole]
www.hash.com/hashfaqs/index.html
[the official FAQs to Animation:Master]